
You turn on the heat, the furnace fires up — but no air comes through the vents. The blower motor isn’t running. Before you assume the worst and call for an expensive repair, there’s one component worth checking first: the capacitor.
A faulty capacitor is one of the most common and overlooked reasons a furnace blower stops working. The good news is that testing it takes less than 10 minutes, the part itself is inexpensive, and catching it early can save you a significant repair bill. This guide walks you through exactly what the capacitor does, how to know if it’s failed, and how to test it in three straightforward steps.
What Is a Furnace Blower Capacitor?
The capacitor is a small cylindrical component inside your furnace’s blower compartment. Its job is to store and release electrical energy to start the blower motor and keep it running efficiently. Think of it as a battery that gives the motor the initial jolt it needs to get spinning — and then continues to support it during operation.
There are two types you’ll encounter in HVAC systems:
- Start capacitor — provides the burst of energy needed to start the motor
- Run capacitor — keeps the motor running smoothly once it’s started
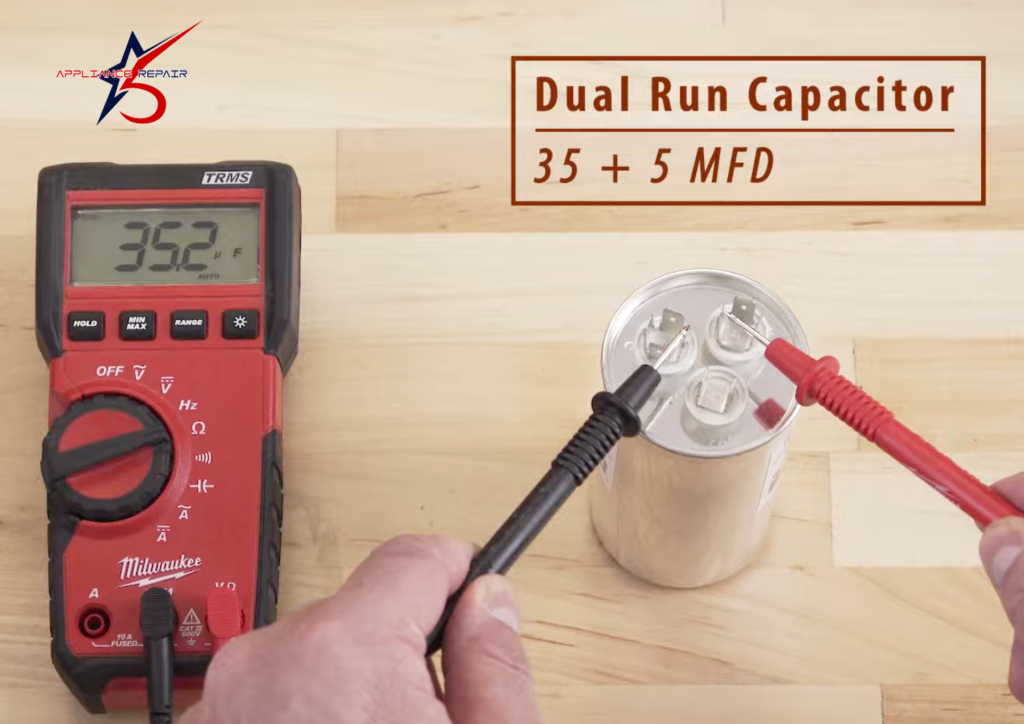
- Dual-run capacitor — handles both functions in a single unit, common in modern systems
When a capacitor weakens or fails, the blower motor either struggles to start, runs poorly, or doesn’t turn on at all.
Signs of a Faulty Furnace Blower Capacitor
Before testing, check whether any of these symptoms match what you’re experiencing:
- Furnace turns on and ignites but no air blows through the vents
- Blower hums or makes a clicking sound but doesn’t spin
- Blower starts briefly then shuts off
- Weak or inconsistent airflow even when the system is running
- Furnace shuts down on high-limit due to heat buildup from no airflow
- Burning smell coming from the blower compartment
If you’re noticing one or more of these, a failed capacitor is a strong possibility.
What You'll Need
- A multimeter with capacitance testing function (microfarads/µF)
- Insulated screwdrivers (flathead and Phillips)
- A resistor or capacitor discharge tool — or a screwdriver with an insulated handle
- Work gloves and safety glasses
- Your furnace owner’s manual (to locate the blower compartment)
Safety First
Capacitors store electrical charge even after the power is turned off. Before you touch anything inside the blower compartment, the capacitor must be fully discharged. Skipping this step risks a serious electrical shock.
Always:
- Turn off power to the furnace at the breaker before opening the unit
- Wait at least 5 minutes after shutting off power before touching internal components
- Discharge the capacitor before handling it
- Wear insulated gloves throughout the process
Step 1: Locate and Discharge the Capacitor
With the furnace powered off at the breaker, remove the access panel on the blower compartment. This is usually secured by one or two screws and slides or swings open. Inside, look for a cylindrical silver or black component — roughly the size of a large battery — with two or three terminals on top. That’s your capacitor.
Before touching it, you need to discharge it safely. Using an insulated screwdriver, briefly touch the blade across the capacitor terminals. You may see or hear a small spark — that’s normal and means it was holding a charge. Do this for each pair of terminals on the capacitor. Once discharged, it’s safe to handle.
Take a photo of the wiring connected to the capacitor before disconnecting anything. This makes reassembly much easier.
Step 2: Remove and Inspect the Capacitor
Carefully disconnect the wires from the capacitor terminals — they pull off by hand or with gentle needle-nose pliers. Then unscrew or unclip the capacitor from its mounting bracket and remove it.
Before reaching for the multimeter, give the capacitor a close visual inspection:
- Bulging or swollen top — a clear sign of failure
- Burn marks or scorch spots on the casing
- Leaking oil or residue around the base
- Cracked or damaged casing
If you see any of these, the capacitor has already failed and needs to be replaced — no further testing needed. If it looks physically normal
Step 3: Test With a Multimeter
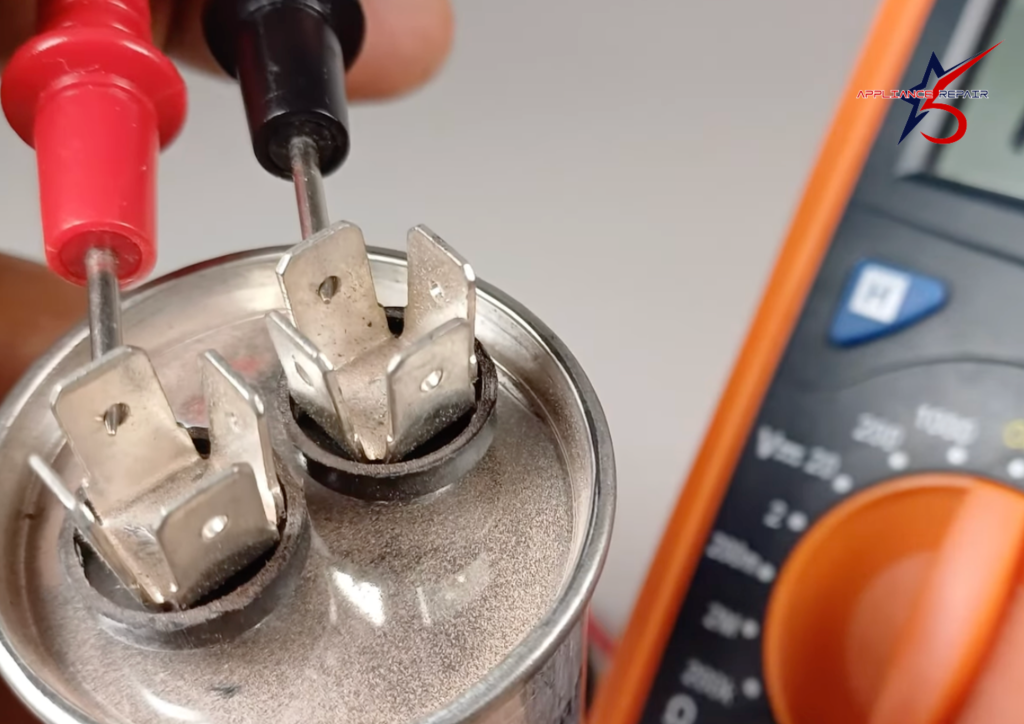
Set your multimeter to capacitance mode — usually indicated by the symbol µF or a capacitor icon. Touch the multimeter probes to the capacitor terminals. For a dual-run capacitor, test each pair of terminals separately.
Now check the reading against the rating printed on the side of the capacitor. Every capacitor has a rated capacitance in microfarads (µF) and an acceptable tolerance — usually ±6% or ±10%.
How to read the results:
- Reading is within the tolerance range — capacitor is functioning correctly, look elsewhere for the fault
- Reading is significantly below the rated value — capacitor is weak and needs replacing
- No reading or zero — capacitor has completely failed and must be replaced
- Multimeter shows OL (overload) — capacitor is shorted and needs replacing
For example, if your capacitor is rated at 45 µF ±6%, an acceptable reading falls between 42.3 µF and 47.7 µF. A reading of 30 µF means it’s failing. A reading of 0 means it’s gone.
What to Do If the Capacitor Has Failed
Replacing a furnace blower capacitor is one of the more manageable HVAC repairs a homeowner can take on. The part typically costs between $10 and $50 depending on the rating and type — a fraction of what a service call costs.
When purchasing a replacement:
- Match the exact µF rating printed on the old capacitor
- Match the voltage rating — never go lower, though slightly higher is acceptable
- Purchase the same type — start, run, or dual-run
To install, simply reverse the removal process: mount the new capacitor in the bracket, reconnect the wires exactly as they were in your photo, replace the access panel, and restore power at the breaker.
If the blower still won’t start after replacing the capacitor, the issue may be with the blower motor itself — which is a more involved repair best handled by a licensed HVAC technician.
Other Reasons Your Furnace Blower Won't Turn On
If the capacitor tests fine, here are other common causes worth investigating:
- Faulty thermostat — check that it’s set correctly and the fan setting is on “Auto” not “Off”
- Tripped circuit breaker — reset the breaker and see if the blower responds
- Blown fuse on the control board — a small fuse on the furnace control board can blow and cut power to the blower
- Faulty limit switch — the high-limit switch shuts the blower down if the furnace overheats
- Failed blower motor — if the motor itself has burned out, it needs professional replacement
- Loose or broken wiring — damaged wiring to the blower motor can prevent it from receiving power
When to Call an HVAC Professional
Testing and replacing a capacitor is within reach for a careful DIYer. But call a licensed technician if:
- The blower still doesn’t work after replacing the capacitor
- You find burn marks or damaged wiring inside the blower compartment
- The blower motor itself shows signs of failure
- You’re not comfortable working around electrical components
- Your furnace is under warranty — DIY repairs can sometimes void coverage
Conclusion
If the capacitor checks out but your blower still won’t run, the issue could be something more complex within the system. Our experienced technicians can quickly diagnose the problem and get everything back on track.
Contact us today to schedule a professional inspection and get your system running smoothly again.
FAQs
Most capacitors last between 10 and 20 years, though heat, humidity, and frequent cycling can shorten their lifespan. If your furnace is over 10 years old and the blower is acting up, the capacitor is always worth checking first.
Yes. A weak capacitor forces the blower motor to work harder than it should to compensate for the reduced starting power. Over time this causes the motor to overheat and wear out prematurely. Replacing a failing capacitor early can extend the life of your motor significantly.
A professional capacitor replacement typically costs between $150 and $300 including parts and labor. The part itself is inexpensive — most of the cost is the service call fee.
No. Running the furnace without the blower causes heat to build up rapidly inside the heat exchanger. The high-limit switch will eventually shut the system down, but repeated overheating can crack the heat exchanger — a serious and expensive failure.
Yes, as long as you follow the safety steps — power off at the breaker, wait before opening the unit, and discharge the capacitor before touching it. If you’re not comfortable with any of these steps, it’s perfectly reasonable to call a professional.